Automating LiaScript Transformations on GitHub with Enhanced Workflows and Asset Generation
- André Dietrich
- Tutorial
- March 25, 2025
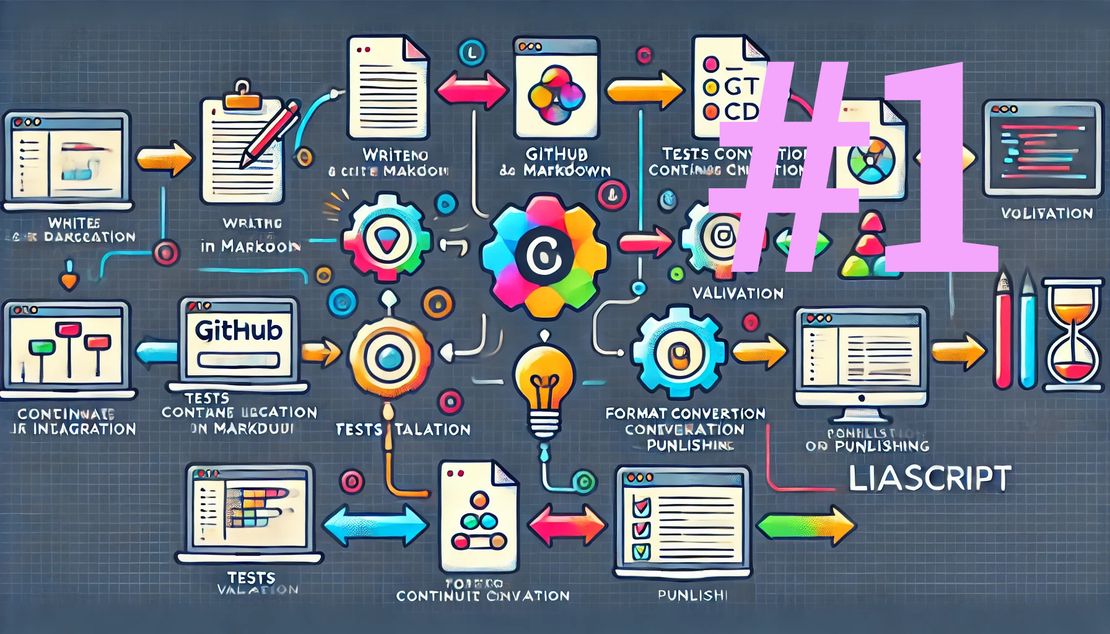
In today’s fast-paced development and educational environments, automation isn’t just a convenience—it’s essential. Automating the transformation of your LiaScript markdown documents into formats like PDF, SCORM, and IMS packages can streamline your workflow and reduce manual effort. In this post, we’ll walk you through setting up GitHub Workflows step by step—even if you’re just getting started with GitHub.
You can find the complete example workflows in the following repository:
Demo RepositoryWhat Are GitHub Workflows?
GitHub Workflows are the backbone of GitHub Actions. They let you automate common tasks—such as building, testing, or deploying your code—using simple YAML files stored in your repository (typically in the .github/workflows directory). Let’s break down the basics:
Key Concepts
Triggers:
Triggers define the event that starts the workflow. Examples include:
- Pushes: Run the workflow whenever you push changes.
- Pull Requests: Trigger when someone opens or updates a pull request.
- Scheduled Times: Use cron syntax to run at set intervals.
- Manual Triggers: Start workflows manually using
workflow_dispatch.
Jobs:
A job is a set of steps that runs in a virtual environment (like an Ubuntu machine). Jobs can run one after another or in parallel.
Steps:
Each job consists of steps that run commands or use pre-built actions (like checking out your code).
Assets and Releases:
Workflows can package outputs (such as PDFs, SCORM, or IMS packages) as release assets, making it easy to share the latest versions of your documentation or e-learning materials.
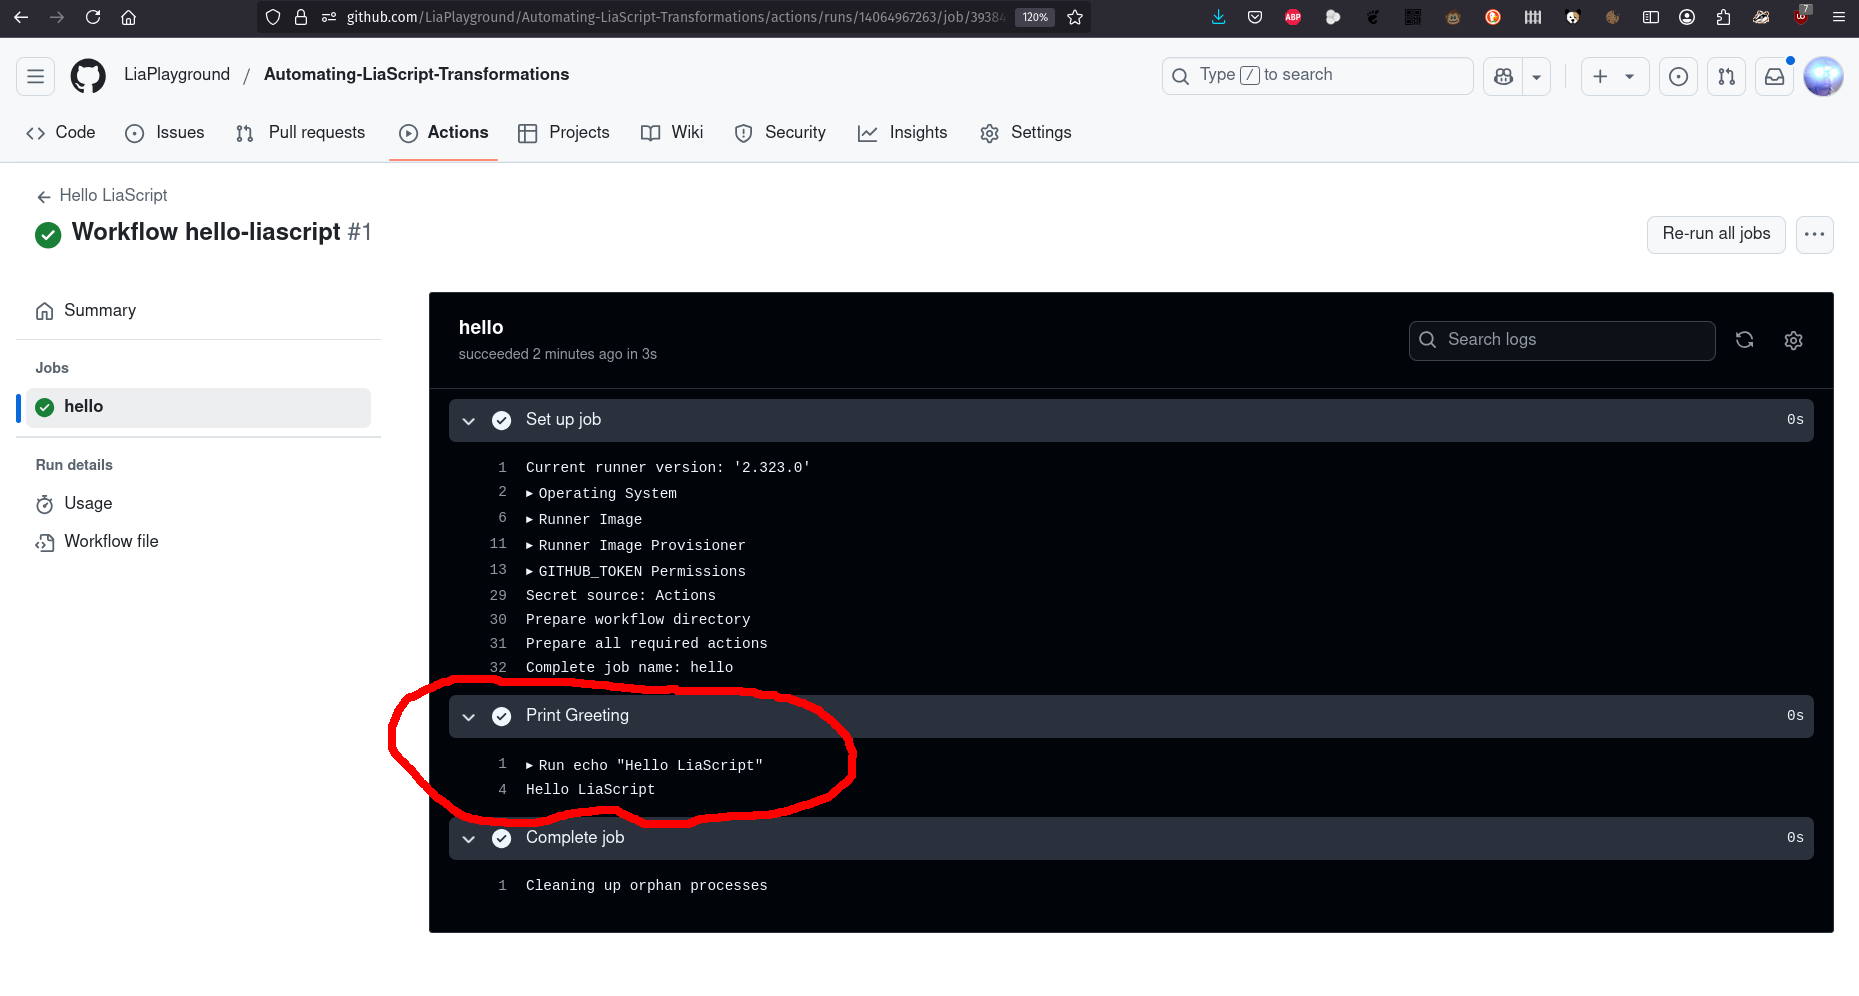
A Simple Example: “Hello LiaScript”
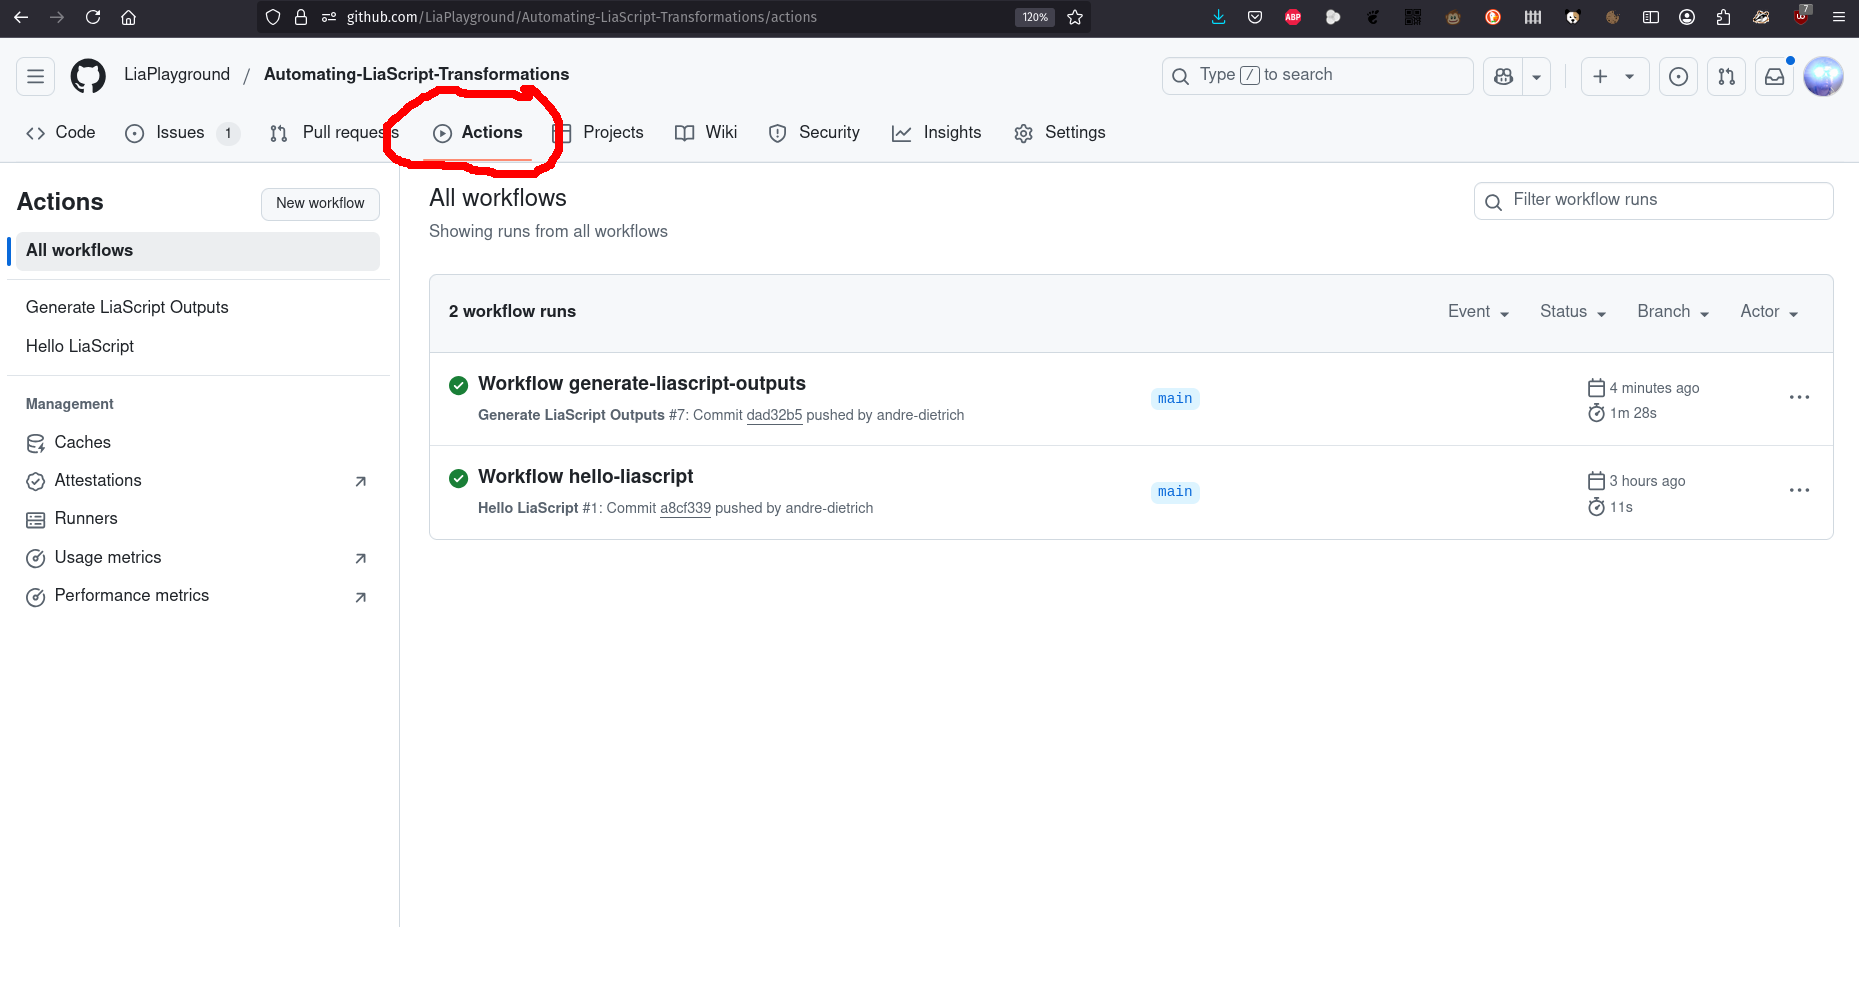
Click on the “Actions” tab in your repository to get started with GitHub Workflows. This is where you’ll create and manage your workflows. Your workflows will be empty, in our case we have already created two workflows, one for the simple example and one for the extended example.
Let’s start with a basic YAML workflow that prints “Hello LiaScript” when you push changes. This example illustrates a single trigger, one job, and one step. You can copy this YAML code into a new file in your repository under .github/workflows/hello-liascript.yml.
# File: .github/workflows/hello-liascript.yml
name: Hello LiaScript

# Trigger: Run this workflow on every push.
on: push

jobs:
  hello:
    # Run on the latest Ubuntu runner.
    runs-on: ubuntu-latest

    steps:
      # Step 1: Print a greeting to the console.
      - name: Print Greeting
        run: echo "Hello LiaScript"
After pushing this file to your repository, GitHub will automatically detect the new workflow and run it. You can check the workflow status, logs, and output in the “Actions” tab.
Enhancing the Workflow: Installing Tools and Running the LiaScript Exporter
Now, let’s extend our simple workflow. This enhanced version installs Node.js and the LiaScript exporter, then converts your README.md into a PDF, SCORM package, and IMS package. Finally, it creates a GitHub release to store these assets.
Extended Workflow Example
Create a new file in your repository under .github/workflows/generate-liascript-outputs.yml and paste the following code:
# File: .github/workflows/generate-liascript-outputs.yml
name: Generate LiaScript Outputs
# Trigger: Run the workflow when changes are pushed to the 'main' branch.
on:
push:
branches:
- main
permissions:
contents: write
jobs:
generate:
runs-on: ubuntu-latest
steps:
# Step 1: Check out the repository's code to project directory.
- name: Checkout Repository
uses: actions/checkout@v4
with:
path: project
# Step 2: Set up Node.js environment.
- name: Set up Node.js
uses: actions/setup-node@v3
with:
node-version: '22' # Specify the Node.js version.
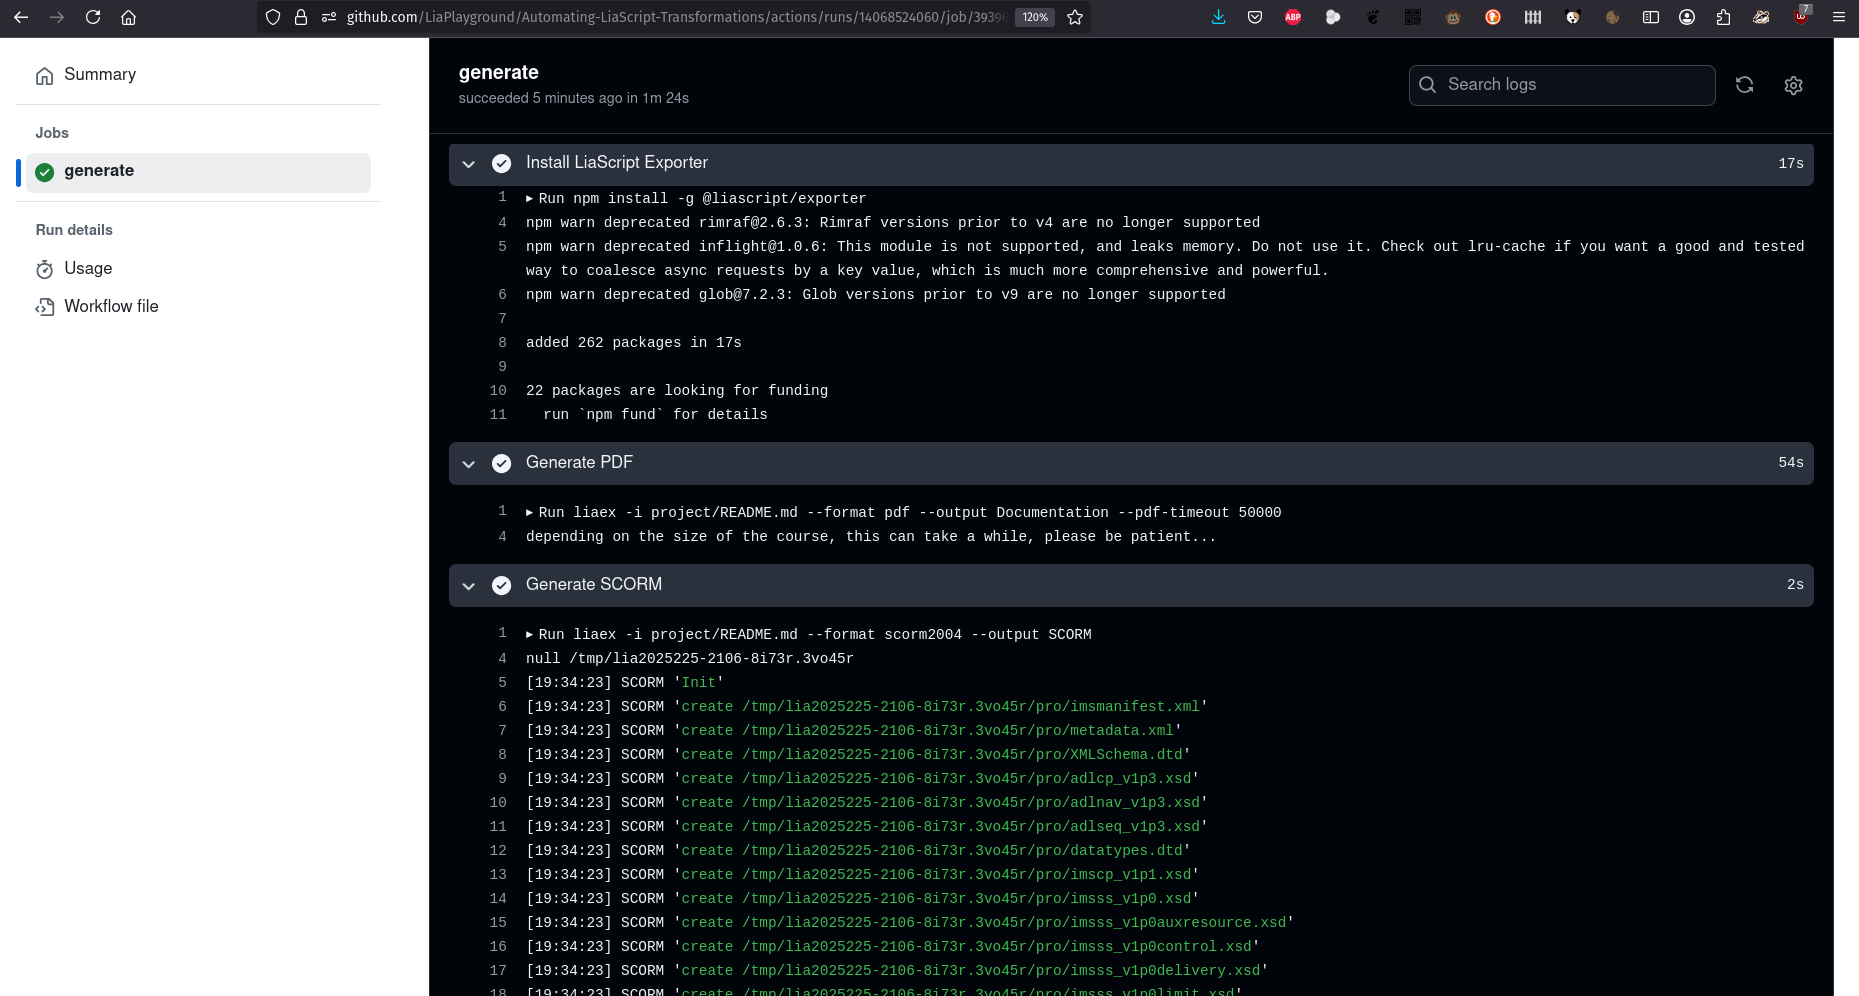
# Step 3: Install the LiaScript exporter globally using npm.
- name: Install LiaScript Exporter
run: |
npm install -g @liascript/exporter
# Step 4: Generate a PDF from README.md.
- name: Generate PDF
run: |
liaex -i project/README.md --format pdf --output Documentation --pdf-timeout 50000
# Step 5: Generate a SCORM package.
- name: Generate SCORM
run: |
liaex -i project/README.md --format scorm2004 --output SCORM
# Step 6: Generate an IMS package.
- name: Generate IMS Package
run: |
liaex -i project/README.md --format ims --output IMS
# Step 7: Create a new GitHub release for the generated assets.
- name: Create New Release
id: create_release
uses: actions/create-release@v1
env:
GITHUB_TOKEN: ${{ secrets.GITHUB_TOKEN }}
with:
tag_name: 'latest'
release_name: 'Latest LiaScript Documentation'
draft: false
prerelease: false
# Step 8: Upload the generated PDF as a release asset.
- name: Upload PDF as Release Asset
uses: actions/upload-release-asset@v1
env:
GITHUB_TOKEN: ${{ secrets.GITHUB_TOKEN }}
with:
upload_url: ${{ steps.create_release.outputs.upload_url }}
asset_path: Documentation.pdf
asset_name: Documentation.pdf
asset_content_type: application/pdf
# Step 9: Upload the generated SCORM package.
- name: Upload SCORM as Release Asset
uses: actions/upload-release-asset@v1
env:
GITHUB_TOKEN: ${{ secrets.GITHUB_TOKEN }}
with:
upload_url: ${{ steps.create_release.outputs.upload_url }}
asset_path: SCORM.zip
asset_name: SCORM.zip
asset_content_type: application/zip
# Step 10: Upload the generated IMS package.
- name: Upload IMS as Release Asset
uses: actions/upload-release-asset@v1
env:
GITHUB_TOKEN: ${{ secrets.GITHUB_TOKEN }}
with:
upload_url: ${{ steps.create_release.outputs.upload_url }}
asset_path: IMS.zip
asset_name: IMS.zip
asset_content_type: application/zip
For more information on the LiaScript-Exporter, different output formats and settings, visit the official documentation:
https://liascript.github.io/exporter/
Detailed Breakdown
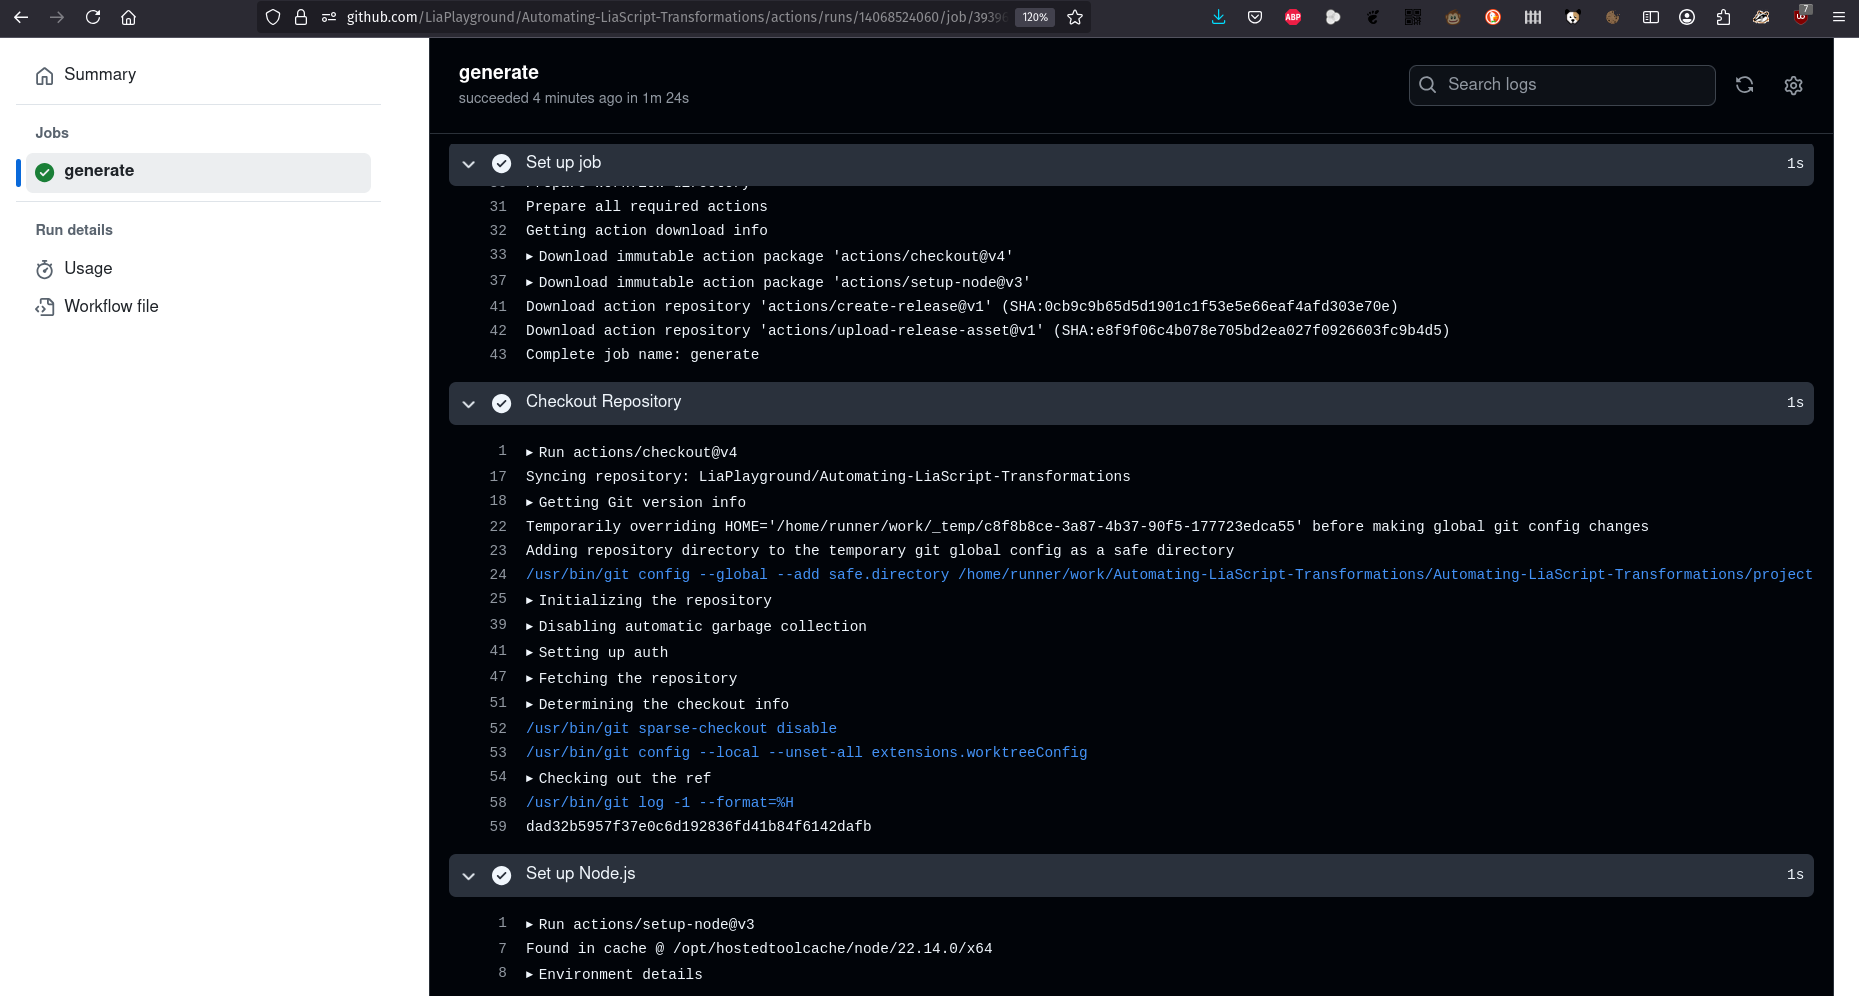
Let’s break down the key steps in this extended workflow, if you open the new workflow file in your repository, you can see the following steps:
View Workflow RunRepository Checkout and Environment Setup:
- Checkout: Uses the official GitHub action to pull your repository’s code.
- Node.js Setup: Configures Node.js (version 16) to run npm commands and install global packages.
Installing and Running the Exporter:
Installation: The LiaScript exporter is installed globally.
Conversion Steps:
- PDF: Converts
README.mdto a PDF. - SCORM & IMS: Similarly, converts to SCORM and IMS packages.
- PDF: Converts
Release Management:
- Create Release: Generates a new GitHub release that will hold your assets.
- Asset Uploads: Each generated file (PDF, SCORM, IMS) is uploaded as a release asset.
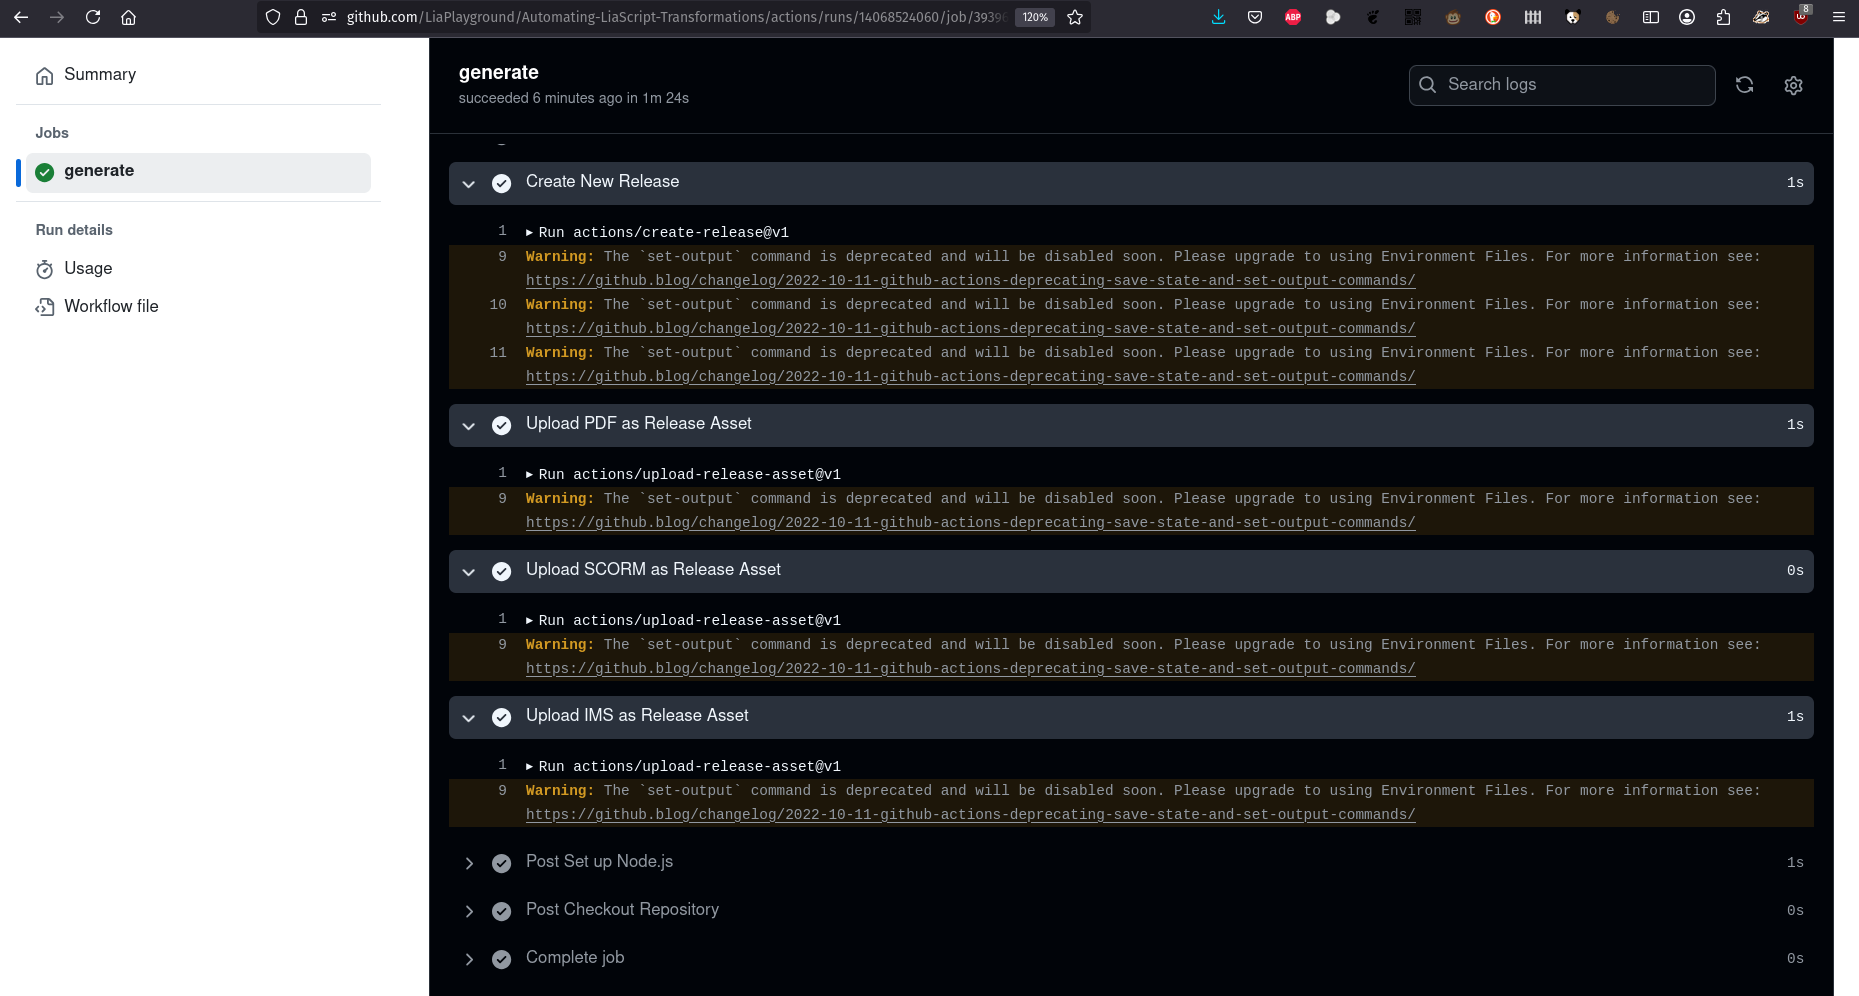
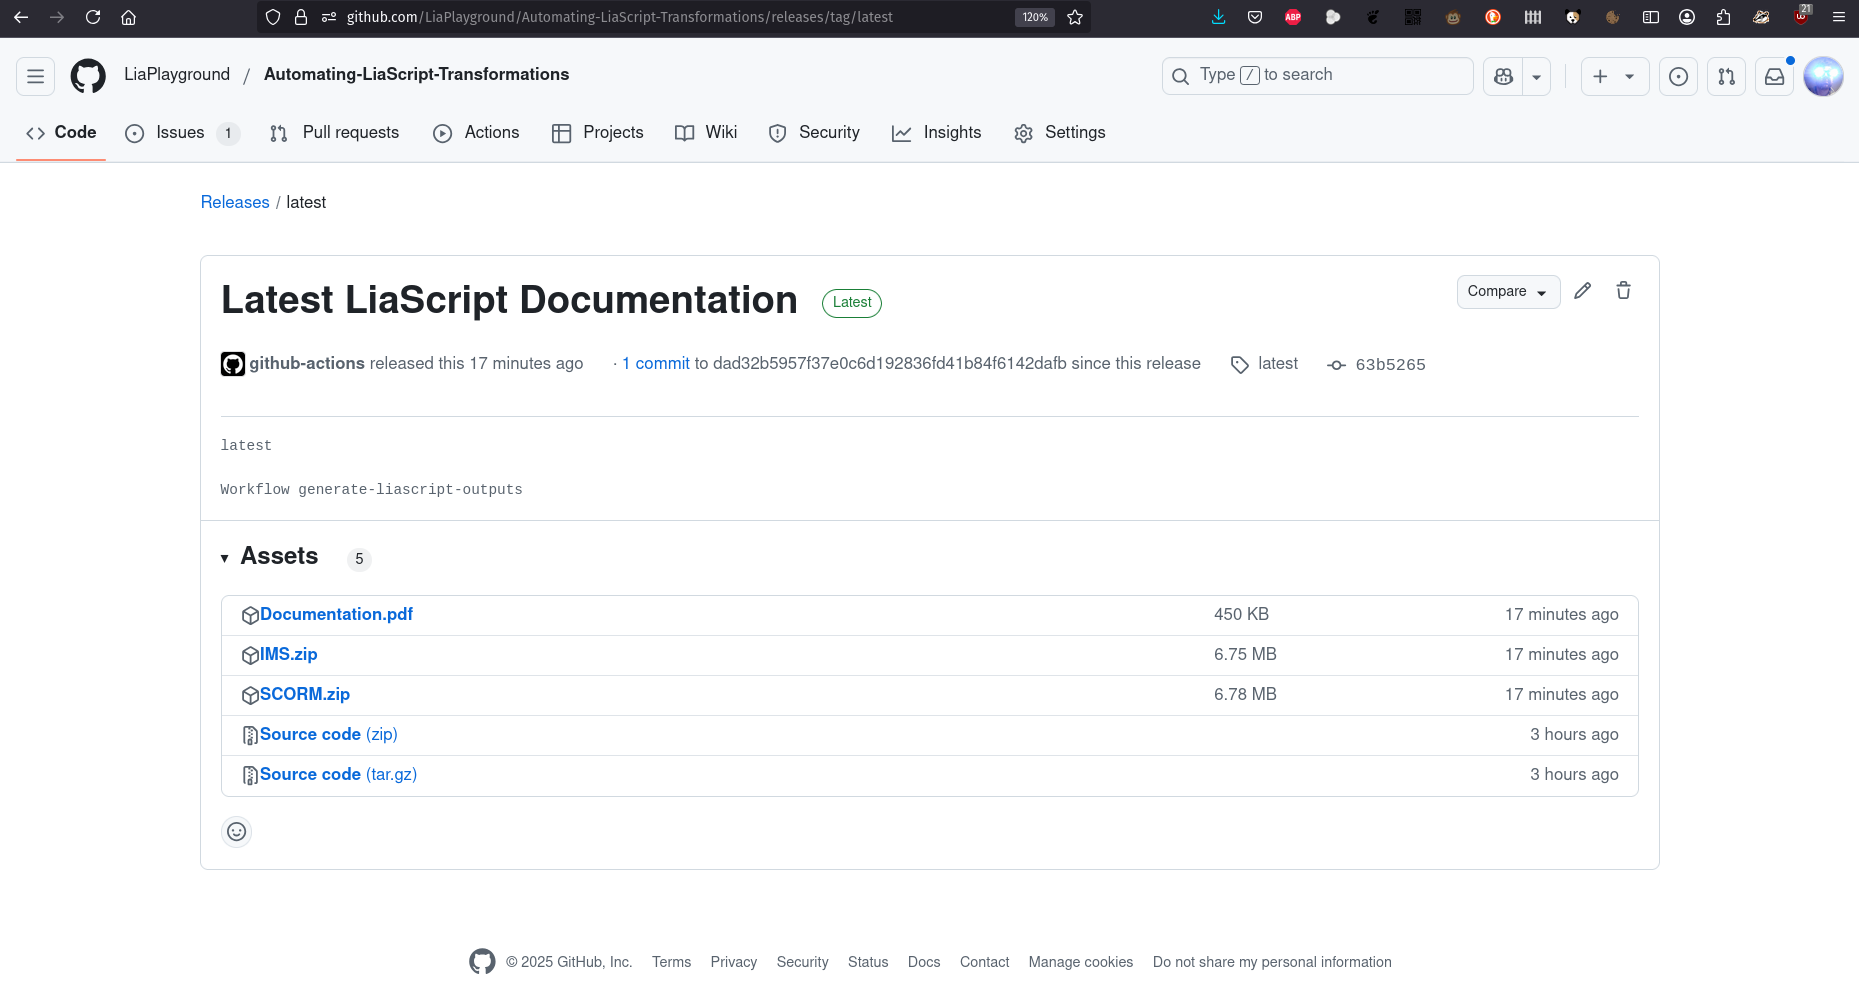
When your workflow generates files (like PDFs or packages), you can upload them as part of a GitHub release. The actions/upload-release-asset action makes it easy to attach these files to a release, ensuring that users always have access to the latest generated assets. After a successful run, you’ll see the generated assets in the release section of your repository.
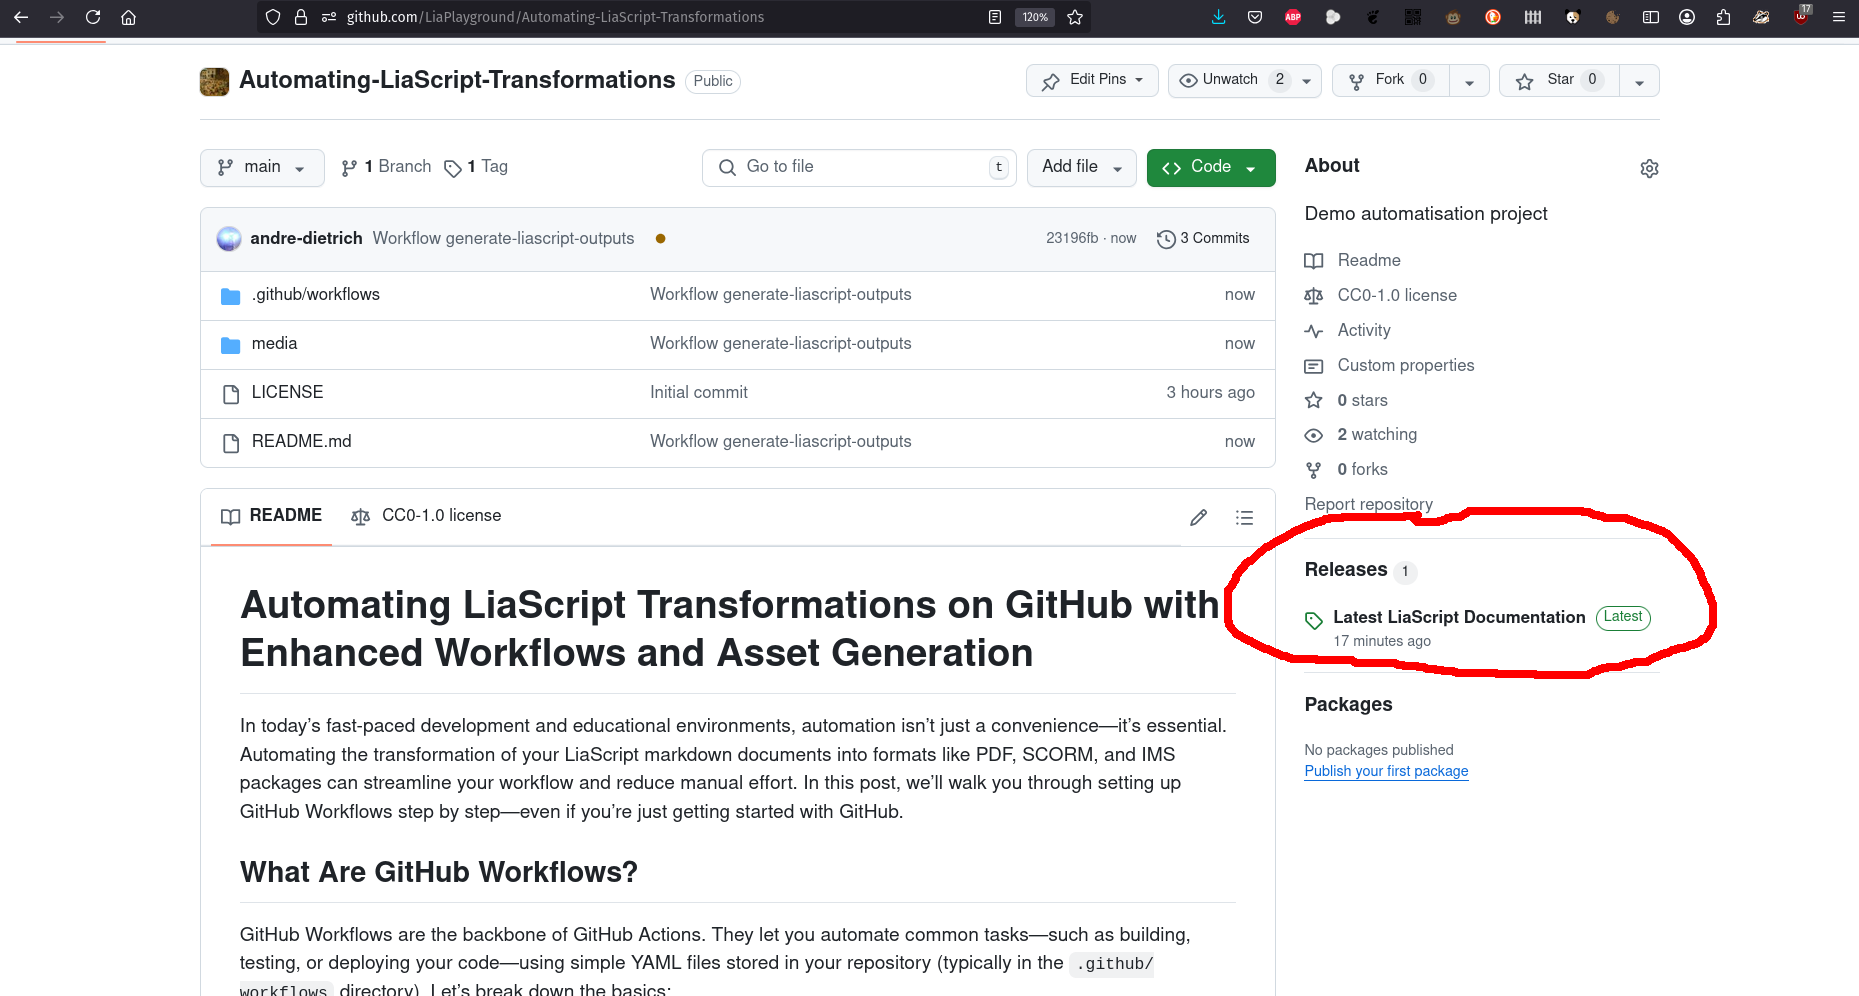
You can download and share these files with others.
Understanding Workflow Triggers and Structure
Triggers
Workflows are activated by various events, such as:
- Push: Every time you push commits to your repository.
- Pull Request: When a pull request is created or updated.
- Schedule: Using cron syntax for regular runs.
- Manual: Triggered by the user with
workflow_dispatch.
For example, to run a workflow on pushes and on a daily schedule:
on:
  push:
    branches:
      - main
  schedule:
    - cron: '0 0 * * *'  # Runs every day at midnight UTC.
Jobs and Steps
- Jobs: Run in isolated environments (e.g., Ubuntu) and can execute sequentially or in parallel.
- Steps: Run sequentially within a job and can be simple shell commands, actions, or scripts.
Each step is designed to be clear and modular, so you can easily add, remove, or update parts of your workflow.
Conclusion
By leveraging GitHub Workflows, you can automate the conversion of LiaScript markdown documents into multiple formats—be it PDFs, SCORM, or IMS packages—with a single YAML file. This step-by-step guide is designed for beginners and emphasizes clarity, modularity, and a hands-on approach.
Happy automating, and remember to revisit your setup regularly for improvements!