Quality Checks on LiaScript with GitHub: Ensuring Document Excellence
- André Dietrich
- Tutorial
- March 26, 2025
In today’s collaborative educational and documentation environments, ensuring quality isn’t just a nice-to-have—it’s essential. While our previous post showed you how to automate LiaScript transformations, this guide focuses on implementing automated quality checks for your Markdown/LiaScript documents using GitHub. These checks help catch spelling errors, improve writing style, ensure inclusive language, and enhance overall document quality—even if you’re just getting started with Git and GitHub.
You can find the complete example workflow in the following repository:
What Are Quality Checks?
Quality checks are automated processes that review your content for various issues before it’s published or shared. For Markdown and LiaScript documents, these checks can identify:
- Spelling errors: Catch typos and misspellings that might confuse readers
- Style issues: Identify passive voice, redundant phrases, or overly complex sentences
- Inclusive language: Flag potentially insensitive or exclusionary terms
- Grammar problems: Highlight grammatical errors that affect readability
Implementing these checks as part of your GitHub workflow brings several benefits:
- Consistency: Maintain a uniform quality standard across all documents
- Efficiency: Catch issues automatically without manual proofreading
- Collaboration: Help team members improve their writing
- Accessibility: Make content more readable for diverse audiences
Setting Up Quality Checks with GitHub Workflows
If you’ve read our previous post, you’re already familiar with GitHub Workflows. As a quick refresher, GitHub Workflows are automated processes defined in YAML files stored in your repository’s .github/workflows directory.
For quality checks, we’ll create a workflow file that runs various checking tools whenever changes are pushed to your repository or when pull requests are created. Let’s look at how to set this up.
Creating the Quality Check Workflow File
To add quality checks to your repository, create a new file at .github/workflows/spell-check.yaml with the following content:
name: Spell Check

on:
  pull_request:
  push:
    branches: [master]

jobs:
  cspell-spellcheck:
    runs-on: ubuntu-latest
    steps:
      - uses: actions/checkout@v3
      - name: Install cspell
        run: npm install -g cspell
      - name: Run cspell on markdown files
        run: npx cspell --locale en-US --show-suggestions "**/*.md"

  write-good:
    runs-on: ubuntu-latest
    steps:
      - name: Checkout Repository
        uses: actions/checkout@v3
      - name: Setup Node.js
        uses: actions/setup-node@v3
        with:
          node-version: '16'
      - name: Install write-good
        run: npm install -g write-good
      - name: Run write-good on Markdown files
        run: npx write-good *.md

  alex:
    runs-on: ubuntu-latest
    steps:
      - name: Checkout Repository
        uses: actions/checkout@v3
      - name: Setup Node.js
        uses: actions/setup-node@v3
        with:
          node-version: '16'
      - name: Install alex
        run: npm install -g alex
      - name: Run alex on Markdown files
        run: npx alex *.md

  proselint:
    runs-on: ubuntu-latest
    steps:
      - name: Checkout Repository
        uses: actions/checkout@v3
      - name: Setup Node.js
        uses: actions/setup-node@v3
        with:
          node-version: '16'
      - name: Setup Python
        uses: actions/setup-python@v2
        with:
          python-version: '3.x'
      - name: Install proselint
        run: |
          npm install -g proselint
          pip install proselint
      - name: Run proselint on Markdown files
        run: npx proselint *.md
This workflow file defines four separate jobs, each running a different quality check tool. Let’s explore each of these tools in detail.
Quality Check Tools in Detail
CSpell: Spell Checking
CSpell is a spell checker specifically designed for checking code and documentation. Unlike traditional spell checkers, CSpell understands programming terms, camelCase naming, and other code-specific patterns.
How CSpell Works
CSpell scans your Markdown files for spelling errors and provides suggestions for corrections. It uses dictionaries for different languages and can be configured to ignore specific words or patterns.
In our workflow, we install and run CSpell with these commands:
- name: Install cspell
  run: npm install -g cspell
- name: Run cspell on markdown files
  run: npx cspell --locale en-US --show-suggestions "**/*.md"
The --locale en-US flag specifies American English as the default language, and --show-suggestions tells CSpell to provide correction suggestions for misspelled words.
German Language Support
CSpell supports multiple languages, including German, through additional dictionary packages. To add German language support, you would install the German dictionary package:
npm install -g @cspell/dict-de-de
And then configure CSpell to use it by adding the German locale to your command:
npx cspell --locale en-US,de-DE --show-suggestions "**/*.md"
Using .cspell.json for Ignore Words
For project-specific terminology or names that shouldn’t be flagged as spelling errors, you can create a .cspell.json file in your repository root. Here’s an example:
{
  "version": "0.2",
  "language": "en-US",
  "ignoreWords": [
    "LiaScript",
    "Markdown",
    "GitHub",
    "workflow",
    "André",
    "Deutsch",
    "Joghurt"
  ]
}
This file tells CSpell to ignore the listed words, which is particularly useful for technical terms, brand names, or foreign language words that appear in your documents.
Write-Good: Style Checking
Write-Good is a linter for English prose that helps improve writing style by identifying common issues like passive voice, weasel words, and overly complex sentences.
How Write-Good Helps
Write-Good analyzes your text and provides suggestions to make it more direct, clear, and engaging. It flags issues like:
- Passive voice (“The button was clicked” instead of “Click the button”)
- Weasel words (“very”, “quite”, “extremely”)
- Redundant phrases (“completely eliminate”, “past history”)
- Clichés and other style issues
In our workflow, we set up Write-Good with these steps:
- name: Install write-good
  run: npm install -g write-good
- name: Run write-good on Markdown files
  run: npx write-good *.md
Configuration Options
Write-Good allows you to disable specific checks if they don’t fit your writing style or purpose. For example, to disable passive voice checking:
npx write-good *.md --no-passive
Available options include:
--no-passive: Ignore passive voice--no-illusion: Ignore lexical illusions--no-so: Ignore “so” at the beginning of sentences--no-adverb: Ignore adverbs--no-tooWordy: Ignore wordy phrases--no-cliches: Ignore clichés
German Language Support
Write-Good has a German extension called schreib-gut that provides similar style checks for German text. You can install and run it like this:
npm install -g schreib-gut
write-good *.md --checks=schreib-gut
Alex: Inclusive Language Checking
Alex is a tool that helps you find and correct potentially insensitive or inconsiderate writing. It checks for gender-favoring, polarizing, race-related, religion-inconsiderate, and other unequal phrasing.
How Alex Helps
Alex scans your text for potentially problematic language and suggests more inclusive alternatives. It helps ensure your content is welcoming to all readers by flagging terms that might be:
- Gender-biased (e.g., “fireman” instead of “firefighter”)
- Ableist (e.g., “crazy” or “insane” for “surprising” or “extreme”)
- Racially insensitive
- Age-discriminatory
In our workflow, we configure Alex with:
- name: Install alex
  run: npm install -g alex
- name: Run alex on Markdown files
  run: npx alex *.md
Configuration Options
Alex can be configured to ignore certain rules or specific instances where flagged terms are used appropriately. You can create an .alexrc file or add configuration to your package.json file:
{
  "allow": ["knob", "special"]
}
This would tell Alex to ignore the words “knob” and “special” even if they might otherwise be flagged.
Proselint: Advanced Style Checking
Proselint is a more sophisticated linter for prose that checks for issues related to style, grammar, consistency, and more. It’s based on advice from world-class writers and editors.
How Proselint Helps
Proselint identifies issues in categories like:
- Redundancy and repetition
- Jargon and corporate speak
- Sexism and bias
- Spelling errors
- Consistency in spelling, hyphenation, and abbreviations
- Typography (proper use of dashes, quotation marks, etc.)
In our workflow, we set up Proselint with:
- name: Install proselint
  run: |
    npm install -g proselint
    pip install proselint
- name: Run proselint on Markdown files
  run: npx proselint *.md
Note that Proselint requires both npm and Python installations, as it’s a Python tool with an npm wrapper for easier integration.
Configuration Options
Proselint can be configured using a .proselintrc file in JSON format:
{
  "checks": {
    "typography.diacritical_marks": false,
    "typography.exclamation": false
  }
}
This would disable checks for diacritical marks and exclamation points.
Implementing the Quality Checks Workflow
Now that we understand each tool, let’s walk through how to implement the complete quality checks workflow in your repository.
Step 1: Create the Workflow File
Create a new file at .github/workflows/spell-check.yaml with the content shown earlier. This file defines when and how the quality checks will run.
Step 2: Add Configuration Files
For more customized behavior, add the following configuration files to your repository root:
.cspell.jsonfor CSpell ignore words.alexrcfor Alex configurations (if needed).proselintrcfor Proselint configurations (if needed)
Step 3: Commit and Push
Commit these files to your repository and push them to GitHub:
git add .github/workflows/spell-check.yaml .cspell.json
git commit -m "Add quality check workflow and configurations"
git push
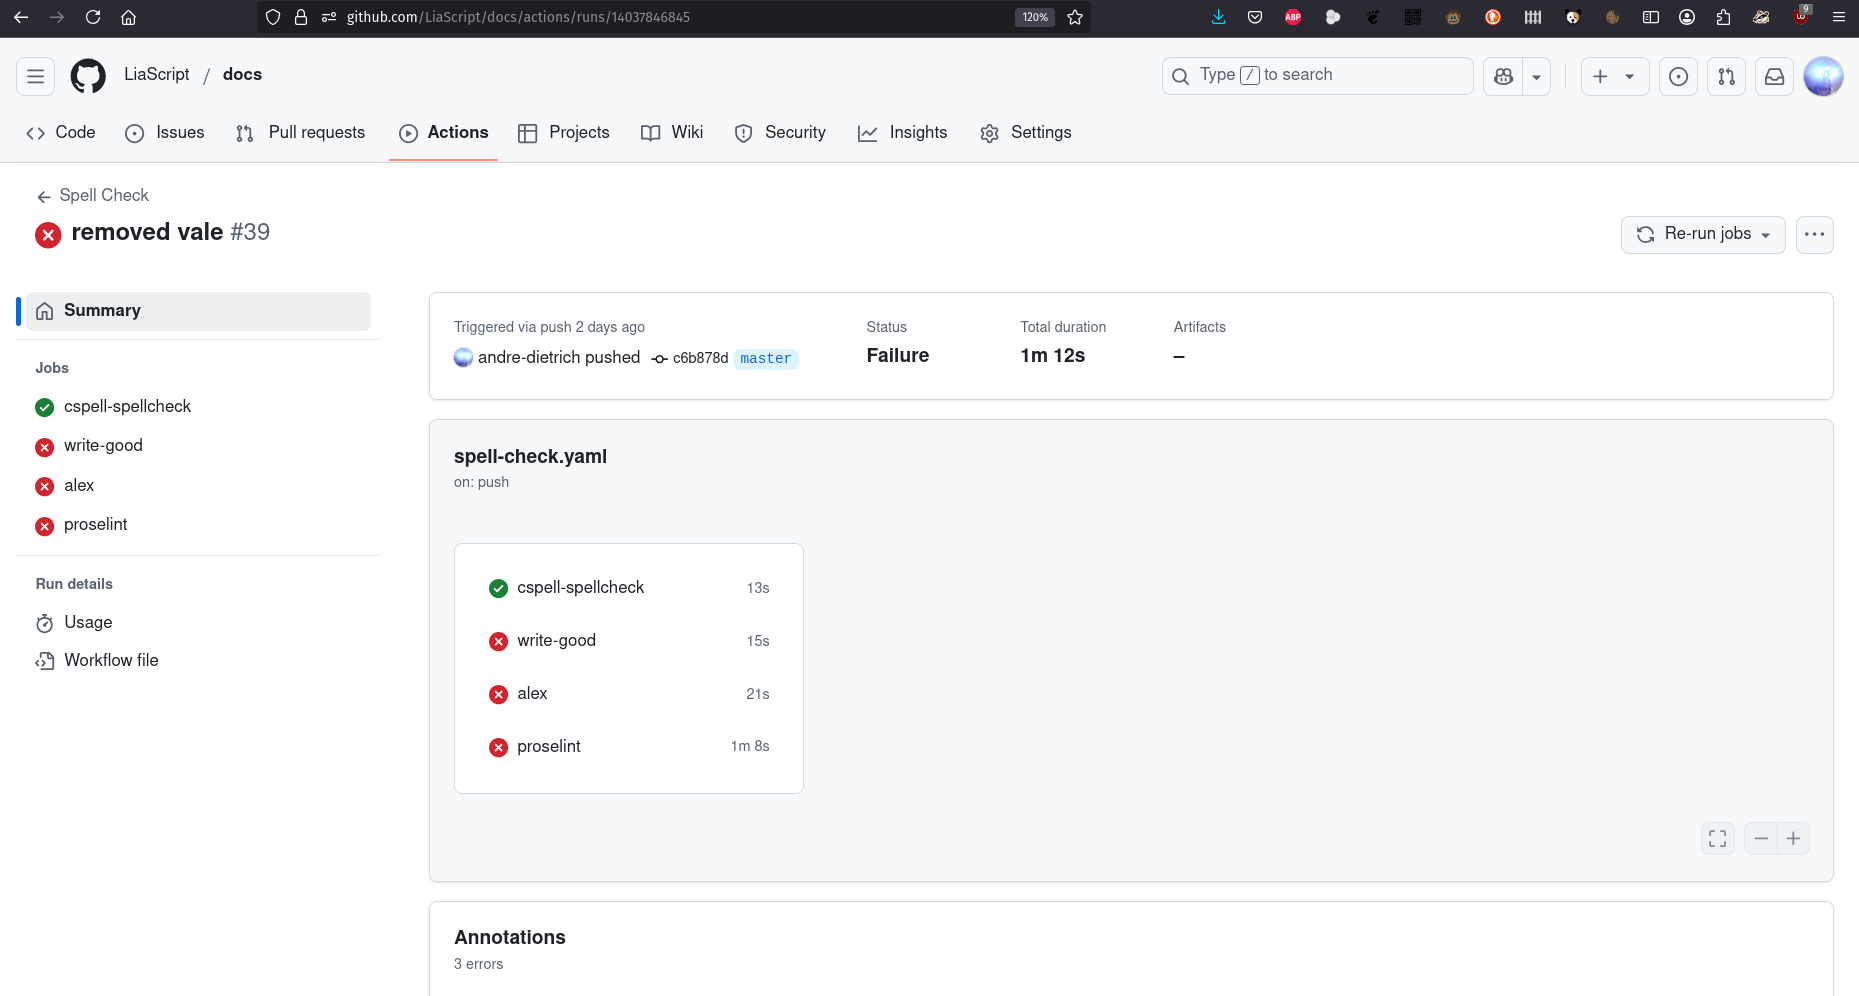
Step 4: View Results
After pushing, GitHub will automatically run the workflow. You can view the results by:
- Going to your repository on GitHub
- Clicking on the “Actions” tab
- Selecting the “Spell Check” workflow
- Reviewing the output of each job
Handling Multiple Languages
Working with multiple languages, especially German as mentioned in the requirements, requires some additional configuration.
CSpell for German Documents
For German language support in CSpell:
Install the German dictionary:
npm install -g @cspell/dict-de-deUpdate your
.cspell.jsonfile to include German:{ "version": "0.2", "language": "en-US,de-DE", "ignoreWords": [ "LiaScript", "Markdown", "GitHub", "workflow" ], "dictionaries": ["en_US", "de-de"] }For mixed-language documents, you can specify language in Markdown files using HTML comments:
<!-- cspell:language de-DE -->
Hier ist ein deutscher Absatz.
<!-- cspell:language en-US -->
Here is an English paragraph.
Interpreting and Acting on Quality Check Results
When your workflow runs, it will produce output for each tool. Here’s how to interpret and act on these results:
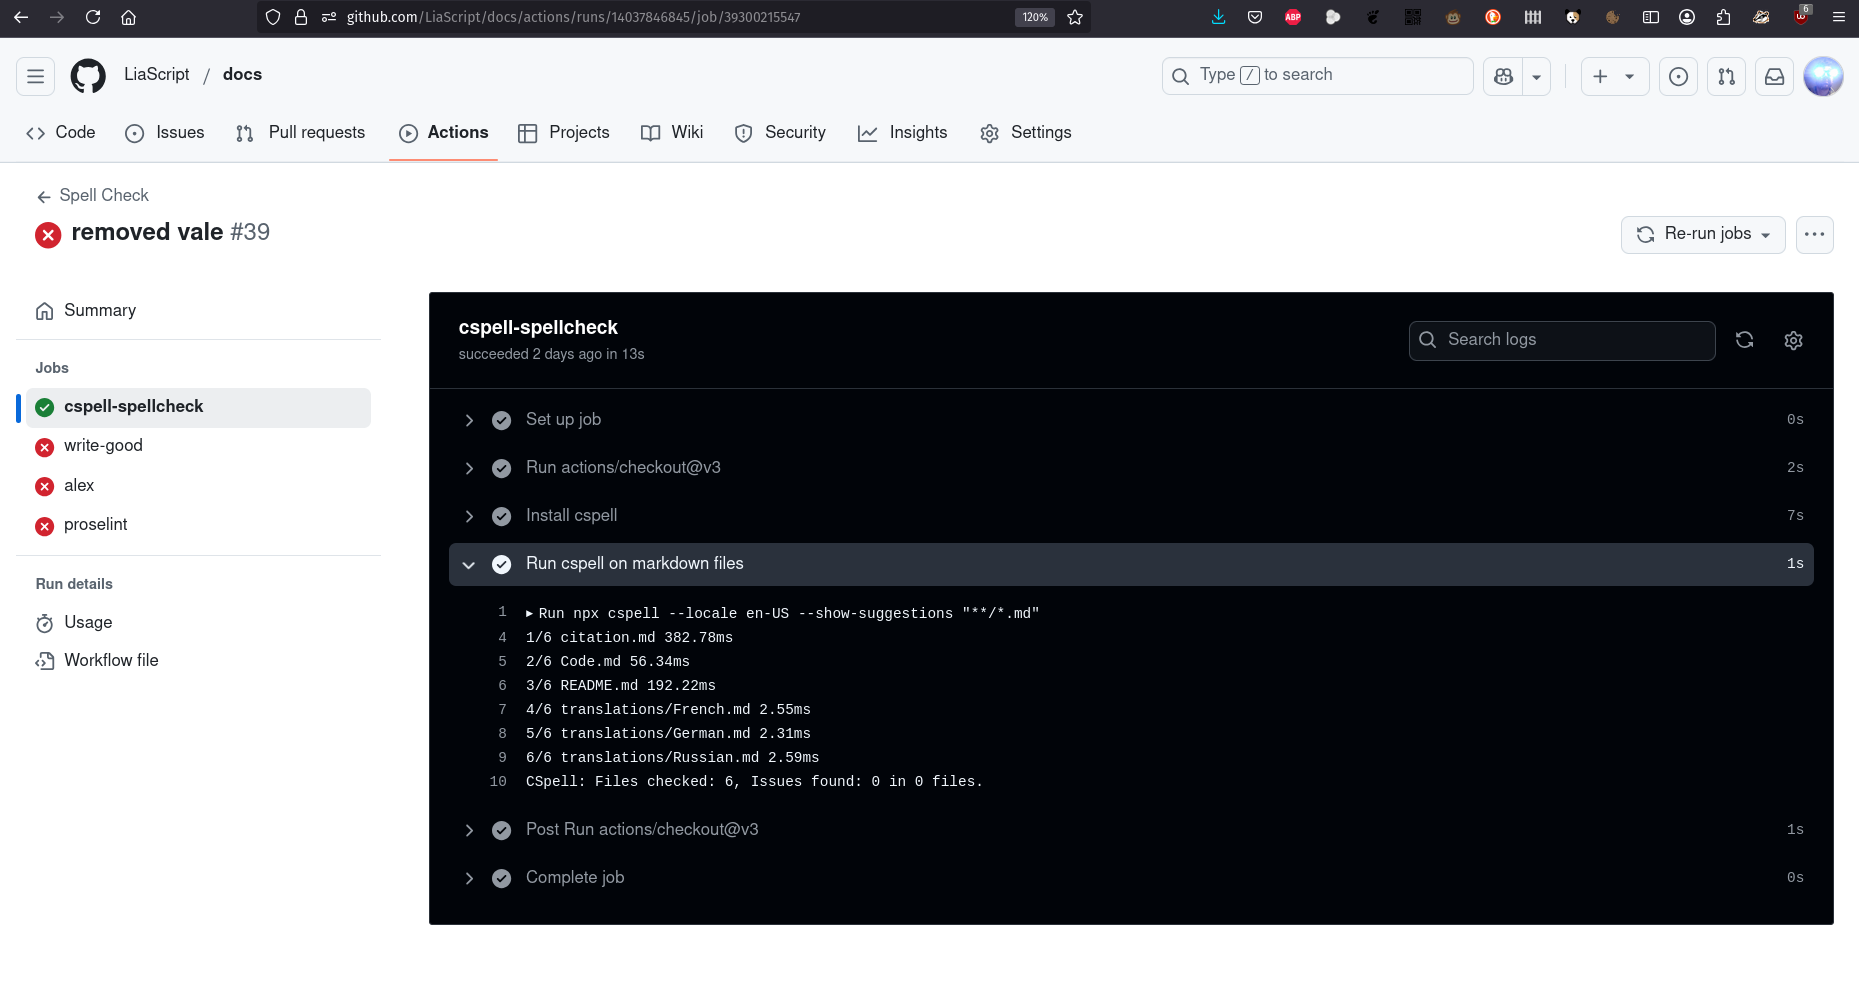
Understanding CSpell Output
CSpell will list misspelled words along with their location and suggestions:
/path/to/file.md:10:15 - Unknown word (beispiel)
For each flagged word, you can:
- Fix the spelling if it’s truly an error
- Add it to your
.cspell.jsonignore list if it’s correct but unknown to the dictionary
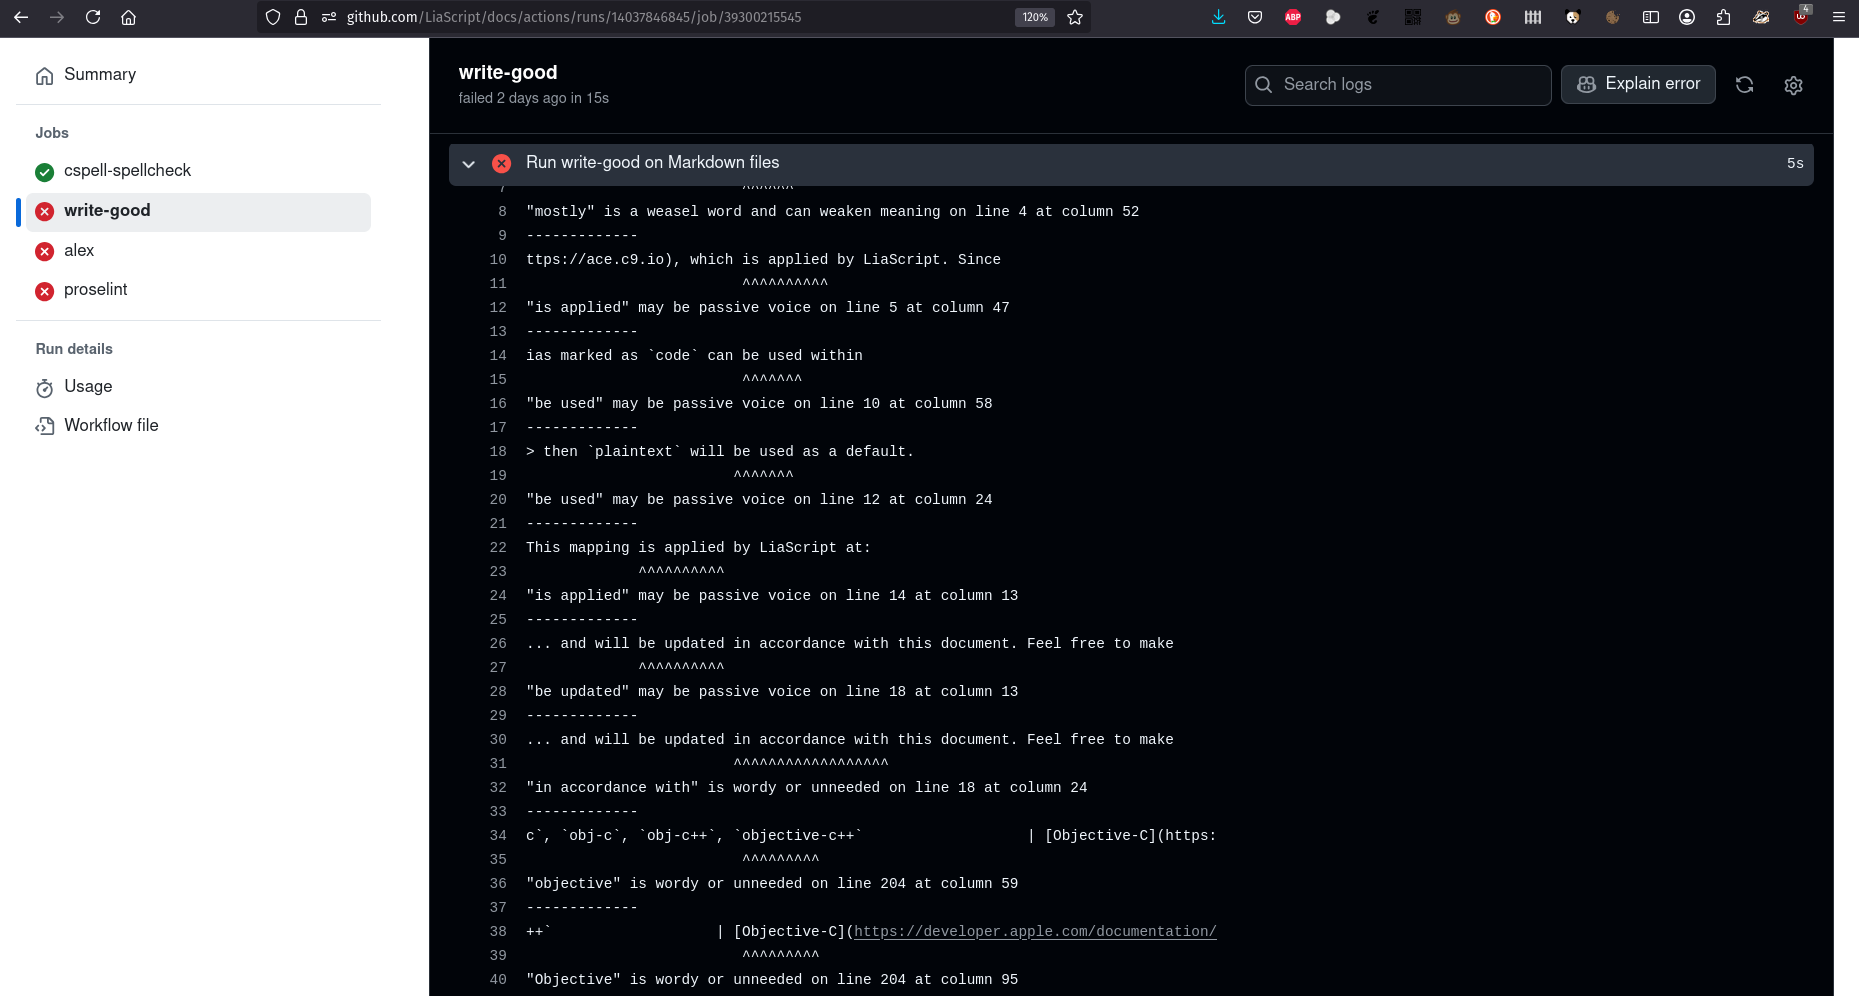
Understanding Write-Good Output
Write-Good highlights style issues with explanations:
/path/to/file.md:15:10 - "very" can weaken meaning
For each suggestion:
- Consider revising the flagged phrase for clarity and impact
- Decide if the suggestion applies to your specific context
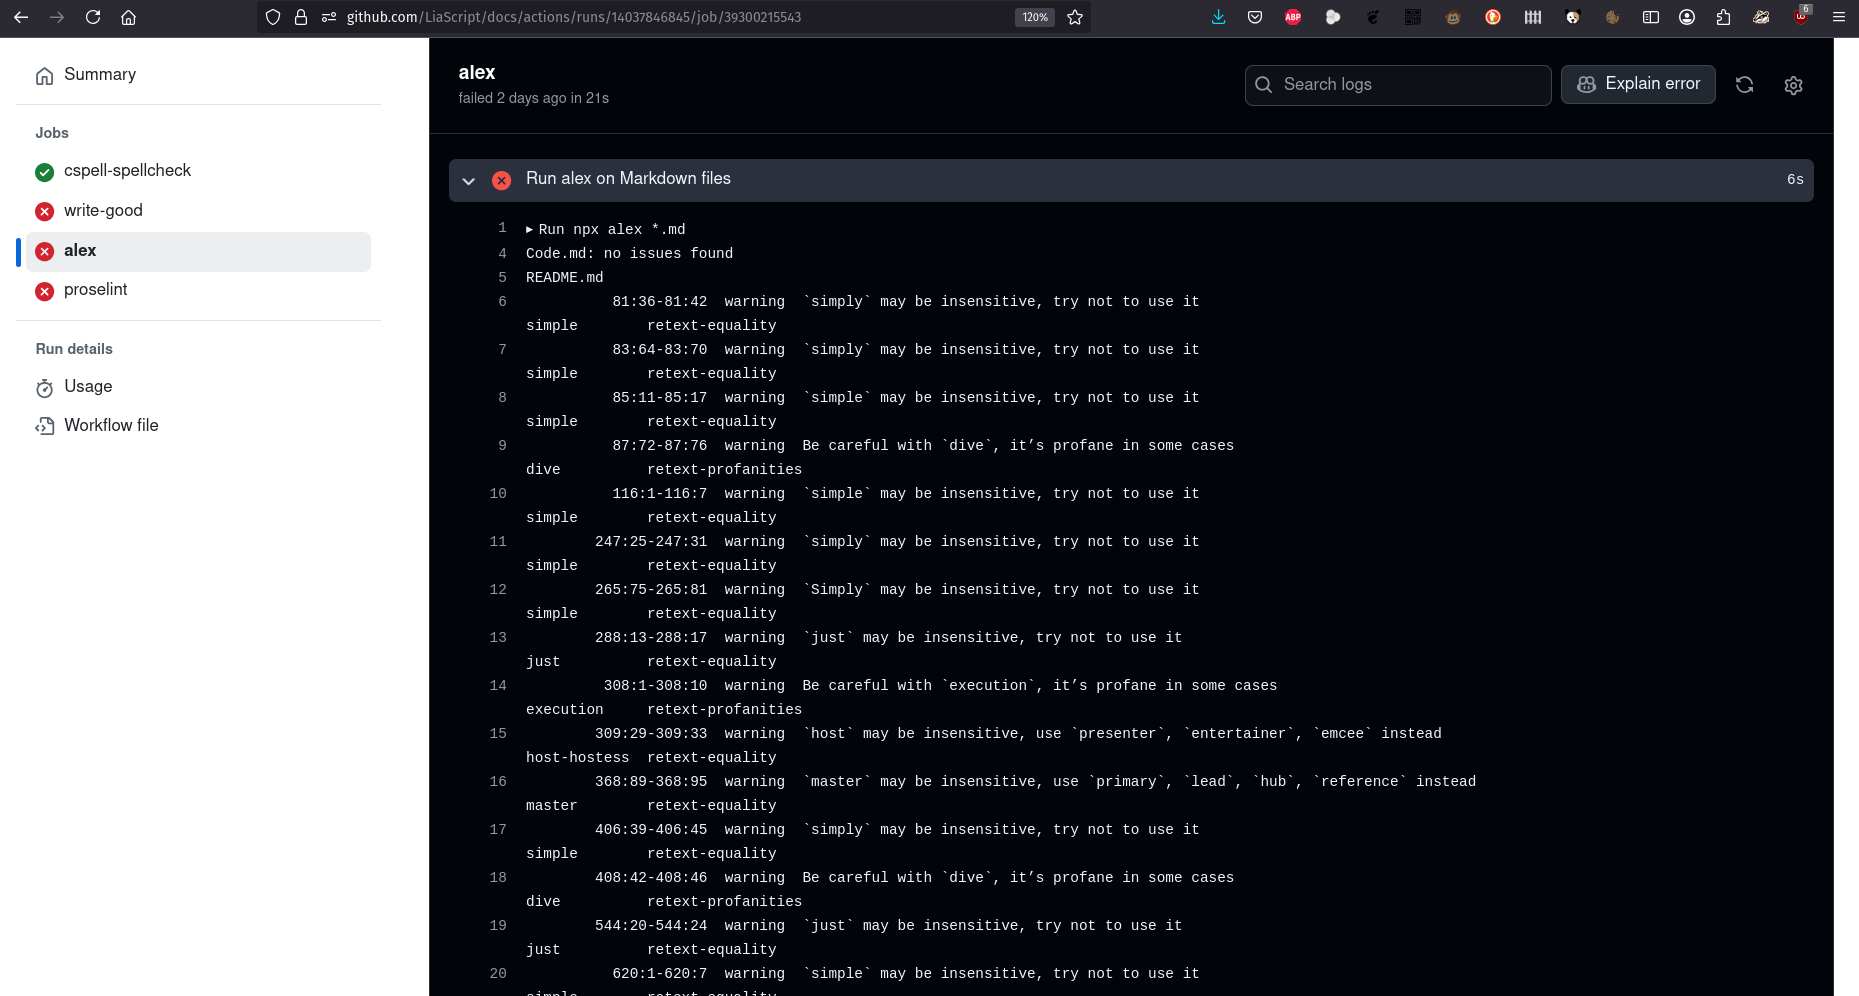
Understanding Alex Output
Alex provides detailed explanations of potentially problematic language:
/path/to/file.md:20:5 - "crazy" may be insensitive, use "surprising", "unexpected", or "unusual" instead
For each flagged term:
- Consider the suggested alternatives
- Evaluate whether the term is appropriate in context
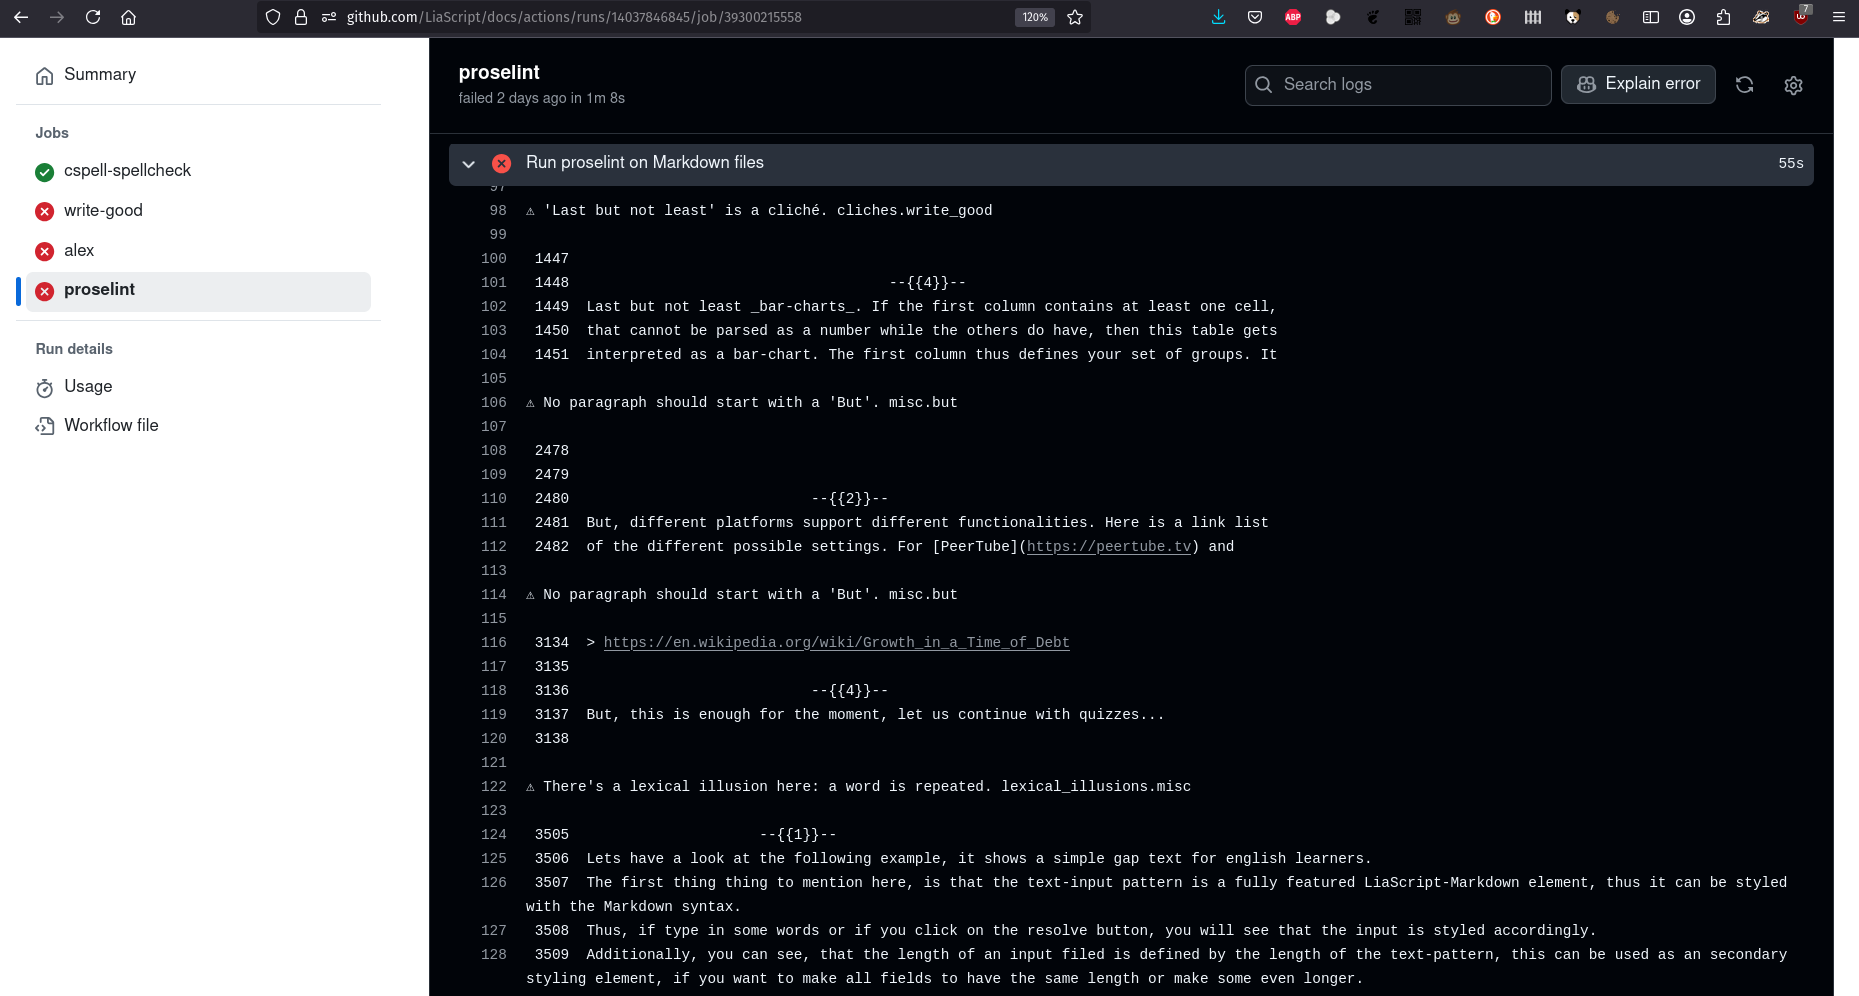
Understanding Proselint Output
Proselint gives detailed style and grammar suggestions:
/path/to/file.md:25:8 - typography.symbols.curly_quotes Use curly quotes instead of straight quotes.
For each suggestion:
- Review the specific style rule being applied
- Decide if it’s appropriate for your document
Conclusion
Implementing automated quality checks for your Markdown and LiaScript documents brings consistency, efficiency, and improved readability to your content. By leveraging GitHub Workflows and the tools we’ve explored—CSpell, Write-Good, Alex, and Proselint—you can catch issues before they reach your audience, even if you’re new to Git and GitHub.
For multilingual content, especially German documents, additional configuration is needed, but the effort pays off in higher quality documentation. The .cspell.json file with its ignore words list is particularly useful for handling technical terms and language-specific words.
We encourage you to start with the basic workflow provided in this post and gradually customize it to fit your specific needs. Quality checks aren’t about enforcing rigid rules—they’re about helping you communicate more effectively with your audience.